Mom, Wife, Chef, Gardener, Dog Wrangler, Mom, Writer, Friend, Daughter, Sister, Mom, Creative Problem Solver, DIY Chick...figuring out life one day at a time.


Friday, December 10, 2010

Mom/Contrite Blogger: November update

So here it is, one full month after I last entered a blog post. Between a sick baby, busy husband, my birthday, Thanksgiving and life in general November just flew by and I barely had a chance to check my email, let alone blog. So now, while the dogs are milling around begging for their walk, I am sitting down to ACTUALLY BLOG because the baby is asleep! Not asleep in my arms and fussing if I so much as shift position, but asleep in the bed in another room and I actually have a few moments of free time. Sorry dogs, you've got to wait.
So, November. November is a great month because 1) I love Thanksgiving, it's such a Chefy holiday, and 2) my birthday. Which was actually on Thanksgiving this year. First off thanks to all my wonderful family who braved the weather and gathered for my birthday celebration (held the weekend before the actual date) and thank you for all the wonderful presents. Also thank you to my husband for the Kindle, yet another reason I haven't made time to blog lately. : )
For Thanksgiving this year my husband and I decided to be at home, since he worked almost all day anyway and since we saw a lot of family the weekend before. Now this may sound shocking for a couple of Chefs, but I've never cooked Thanksgiving dinner before. (At home at least, I've helped cook it at work tons of times) When we aren't working for the holiday we always go to family's and only help with the cooking. This is the first time I've done it all myself. Surprisingly it was really fun.
Now, normally I'm all for traditional dishes, but since it was just the husband and I, plus a baby who wasn't interested in our food anyway, I decided to experiment a little.
Turkey: We had bought a fresh 20 pound turkey which we then split in half. Half went into the freezer for another use and half was for the big day. Rather than simply roasting the turkey in the oven I decided on a glazed turkey recipe from Cook's Illustrated. It called for a butterflied turkey, but half a turkey worked just as well. One hour before cooking (can be done up to a day ahead) I dried the turkey skin, poked some holes in it where there were big fat deposits, then rubbed the skin with a mixture of 1 T each kosher salt, pepper and baking soda. The turkey then sat at room temp for an hour before baking (store in the fridge overnight if doing a day ahead). I baked the turkey low and slow at 275 until it temped as done (165-175 degrees) then took it out and let it rest for half an hour while I made the glaze.
Glaze: 1 cup cranberries, 3 cups apple cider, 1/2 cup molasses, 1/2 cup cider vinegar, 1 T Dijon, 1 T grated fresh ginger, 2 T butter. Cook everything but the butter in a saucepan until bubbly and reduced to about 1 1/2 cups, approx 30 min. Strain through a sieve, pressing on solids to get all the liquid. Discard solids. Transfer 1/2 cup of remaining glaze to saucepan, brush turkey skin with 1/3 of the glaze, place into 450 degree oven for 7 - 10 minutes to set the glaze. Remove turkey and brush with more glaze, repeat for three glaze applications total. Mix reserved glaze with butter and simmer with drippings from turkey to make a 'gravy'.

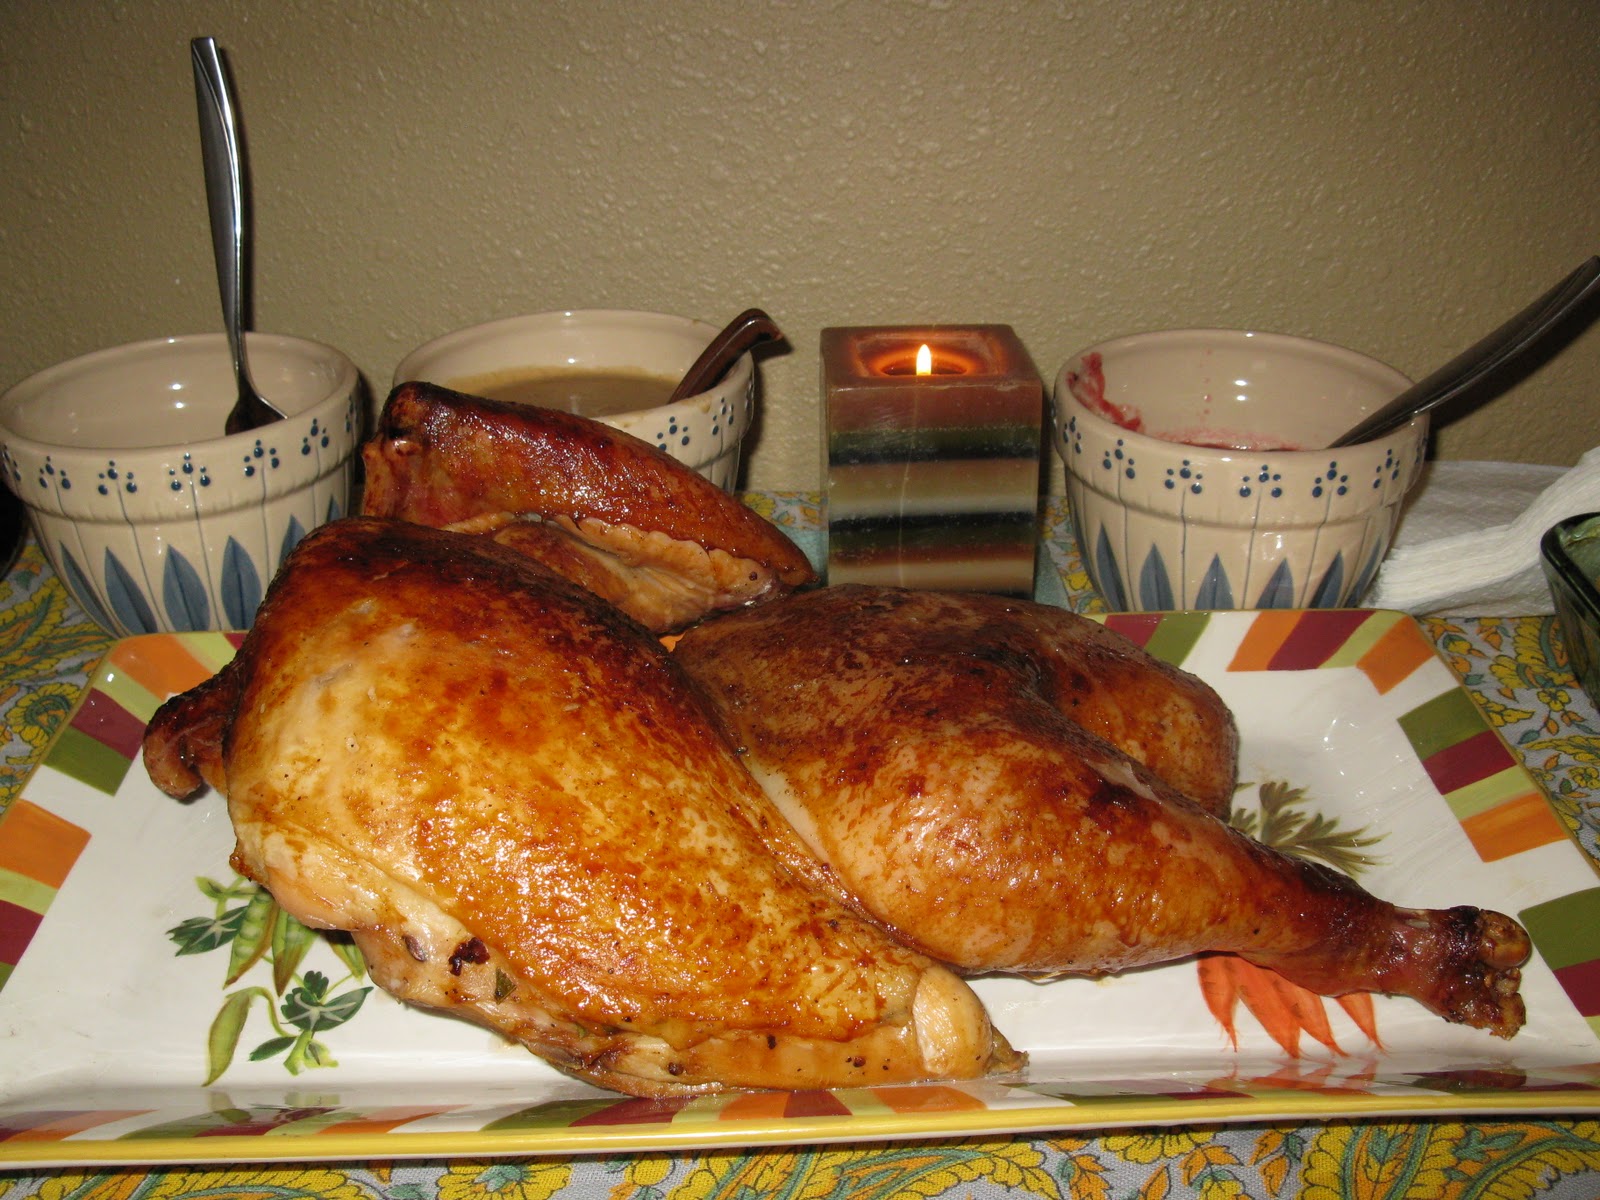
beautiful glazed turkey.
The turkey came out delicious, very moist and with crispy skin. The glaze was yummy as well, but I think I might be more of a turkey purist when it comes to glazed skin vs. regular. I think next year I will use the same method to cook the turkey, but skip the glaze.
Stuffing: my stuffing wasn't so much a recipe as a technique. This technique, also from Cook's Illustrated, is for getting as close as possible to stuffing cooked in the bird without actually cooking it in the turkey. It involves browning off some segmented turkey wings and placing them on top of the stuffing, then tightly wrapping the pan with foil before baking. You get the moist, turkey flavored stuffing without having to bother stuffing the bird. My stuffing involved both corn bread and sandwich bread, sausage, and sage. It was very good.
Sides included the traditional mashed potatoes and gravy and some oven roasted chantrell and crimini mushrooms that I tossed with oil, sage, salt and pepper and then roasted on a sheet tray in the oven at 450 for twenty minutes. Also, cranberry sauce that I made with cranberries and orange juice and spices.
the Thanksgiving table.
It was more than enough food for two of us, could easily have fed five. And best of all it was easy to get done between baby playtime and baby naps. I had a lot of fun doing my first ever Thanksgiving dinner all by myself and it was a nice 1st family Thanksgiving, since it was the baby's first Thanksgiving as well.
The full Thanksgiving plate.
So, there you go, my November in a nutshell. More to come on using Thanksgiving leftovers, budget friendly meals and holiday baking. As the baby allows...

Tuesday, November 9, 2010

Mom/Weather Girl: Snow Day!

Here in the mountains of Washington State, at an elevation of 2,247 ft we have officially had our first day of snow.


Looking out the back door at the beginning of the snow.
 Luckily I had nowhere in particular to be, so I got to spend the day watching the snow fall. Unluckily the baby woke up sick today and has spent the day fussy and feverish so I didn't exactly get a relaxing snow day, but when he was sleeping I made something that helped make the day better and even more cozy.
Apple Oatmeal Muffins.
My husband had made oatmeal this morning, our favorite way, with diced apples and cinnamon mixed in. We had some leftover and I got inspired to make muffins with it. I borrowed Alton Brown's basic Old-Fashioned Muffin recipe (have I mentioned my total geek-girl crush on him?) and added my own stir-ins. Here's what I did.
2 1/4 cups A.P. Flour, 2 tsp. Baking Powder, 1 tsp. Baking Soda, pinch of salt and 1 tsp Cinnamon sifted together. 
1/2 cup Sugar, 1/2 Cup Vegetable Oil, 1 Egg, 1 Egg Yolk, 1 Cup Plain Yogurt whisked together until combined.
Stir the wet ingredients into the dry, then stir in 1 cup of cooked oatmeal (with apples and cinnamon) and 1/2 cup diced fresh apples. Spoon into muffin cups, top with an oatmeal struessell crumb (oats, butter, brown sugar and spices) and bake at 375F for 18-20 minutes.
apple oatmeal muffins
They turned out great, good flavor and texture, not too sweet. And the aroma of cinnamon and apples baking totally made up for the continuously fussy baby.
Here's to more snow!

Thursday, October 28, 2010

Mom/Forager: mushroom mania

We are lucky enough to live in the mountains of the Pacific Northwest where mushrooms love to grow. Last year we had a good time hiking and foraging for mushrooms. Unfortunately this year, between the new baby and my husband's hours at work we haven't had any time for mushroom hunting. Plus, with it being October already and the frosts we've had, I was pretty sure we'd missed mushroom season this year.
Imagine our surprise when we were out walking our dogs the other day and my husband wandered off the trail and right into a patch of chanterelles! We picked all that we could find and brought them home. They were muddy but otherwise perfect.
chanterelles ready for drying.
I cleaned them up and most of them went on sheet trays and into the oven to be dried. After ten hours at 170 degrees (the lowest my oven goes) they are dried out and ready to be stored. A few of the mushrooms got set aside before drying and later on combined with some crimini I had in the fridge and made into my favorite mushroom application: stroganoff.
Stroganoff, to me, has always been about the mushrooms. That and the buttery egg noodles. Yum. I didn't have egg noodles this time, I used regular fettuccine, and I used some leftover pork instead of beef, but it still came out amazing. Here's how I make it.
Mushroom Stroganoff
Heat a teaspoon or two of vegetable oil in a large skillet over medium heat. Thinly slice half an onion and toss it into the pan. Let the onions start to caramelize, then throw in a lot of mushrooms, cleaned and sliced, any type will do. Throw a big pinch of salt in on top of the mushrooms and let them start to cook down. After a few minutes add a clove of minced garlic. Once the mushrooms have cooked down and released their moisture, add a tablespoon of tomato paste, a heaping teaspoon of paprika and some fresh or dried dill and cook for a minute. Deglaze the pan with sherry or white wine, whatever you have lying around. Add a cup of water or stock and let come to a simmer. Taste for seasoning, add salt and pepper to taste then stir in 1/4 cup of sour cream. Stir to incorporate, let sit over medium heat for a few minutes until the sour cream warms up and then serve over pasta or egg noodles. Yum! Cooked and thinly sliced beef or pork can be thrown in with the mushrooms.
Sorry I don't have pictures, the baby was fussy and I didn't take the time. But trust me, it's good stuff.

Monday, October 25, 2010

Mom/Busy Bee: an apple, a pig and a squash walk into a bar...

Or maybe: an apple a day...
Oh well, the point of this post is (hopefully) the last big push of fall food preservation.
First off, three days ago was the much anticipated pig day. We are really lucky to have a friend in town who raises pigs and this is the second year in a row we've bought half a pig. Our half this year totaled 93 pounds of pork in various forms.
pig day!!!
We love doing this, it is so nice to actually know what you are eating and where it comes from. Plus, the pork is really good.
Second, I bought a case of apples at the farmer's market this weekend and we had to get them processed before they sat around too long. Luckily this was the weekend of Grandmothers (both my mother and husband's mother visited this weekend) so we had lots of help. Yesterday my mom and I made applesauce. The case of apples was a mix of three apples: Golden DDelicious, Jonathans, and Johnigolds. We took the Golden Delicious and cooked them down into sauce. They were pretty sweet on their own so I took half of the cooked down apples and pureed them then froze it in ice cube trays for baby food. The other half we left a little chunky and added some sugar and cinnamon for an applesauce that everyone will love.
Today my husband, his mom and I took care of the rest of the apples. We peeled, cored and sliced the apples then cooked them with cinnamon, sugar and nutmeg into apple pie filling.
Chunky apple sauce and apple pie filling
Now why half a case of apple pie filling, you ask? Well, blame it on Alton Brown. I LOVE Alton Brown, we're talking total geek girl crush. He had a pie episode where he put pie filling in tins and froze it into apple pie hockey pucks, then he took them out of the tins and put them in freezer bags and then when he needed to make a pie he had filling ready made. Pretty smart, right? So that's what we're doing.


apple pie filling getting chill.
 I ended up with six pies worth. Guess what family? I'll be bringing apple pie as my holiday food contribution this year!
My husband got creative and made us a pie for dessert tonight. But because he has to be all chef-y it's not a plain apple pie, it's a carmel apple pie.
Chef approved carmel apple pie
We have a few apples set aside for eating, because they are very good apples, and three Jonathans made it into dinner tonight, a lovely fall braised pork roast with apples and vegetables.
With my CSA box we have acquired a backlog of squash so a butternut squash, a small pumpkin and chunk of Hubbard got roasted today. I had originally intended for the pumpkin to get roasted and pureed by itself as pumpkin pie filling, but this pumpkin had way too much moisture in it, so all three types of squash got pureed together into what ended up as a very good squash puree. Not sure if it will be pie, but whatever it ends up as will be yummy.

Fall Braised Pork
1 2 to 3 pound pork roast, any tougher cut will do. (We used a picnic shoulder roast.) Salt and pepper the pork. Heat a large skillet over medium high heat, add a tablespoon of vegetable oil into the hot pan and carefully place the pork in the pan. Brown on all sides then place pork in the slow cooker. Pour off the oil from the pan and hit the pan with a cup of apple cider. Scrape up any brown bits off the bottom of the pan and pour the liquid from the pan into the slow cooker. Add a bay leaf, several sprigs of fresh thyme and a few squirts of whole grain mustard. Add one more cup of apple cider and a few tablespoons of apple cider vinegar. On top of roast place a mixture of vegetables, I used celery, carrots, fennel, cabbage and apples. Cover and cook until pork is falling apart, about six hours on high.

Wednesday, October 20, 2010

Mom/Fry Cook: Snack Attack!

So I'm hungry, the baby is soundly asleep and I find myself with actual time on my hands! Shocking, I know. And while there are several chores that need done, did I mention I'm hungry? I find leftover mashed potatoes in my fridge and leftover paneer from my saag adventures and suddenly a light bulb goes on in my head. No, not the refrigerator light, an idea light bulb. I remembered a recipe I had seen several months ago for an Indian style potato fritter and just like that my mind is made up. The recipe itself is easy and open to lots of interpretation.
Put leftover mashed potatoes in a bowl (I had about a cup and a half). Add paneer (roughly half a cup), crumbled and a spoonful of plain yogurt for moisture. Finely dice one jalapeno and add to the bowl, along with one tablespoon of curry powder and a little salt. Chop some cilantro and add in, and if the mixture is too moist add in a tablespoon or two of flour. The original recipe called for peas, sadly I had none.
potato fritter batter
Next, form the batter into golf ball sized balls and flatten slightly into pucks.
potato fritters ready for breading.
The fritters are now ready for a standard breading procedure. Flour, eggs, panko. I was out of eggs, which is shocking if you know me and my love of eggs, so instead I used some milk and plain yogurt that approximated the viscosity of eggs and seemed to work just fine.  Fry the fritters in a little oil until golden brown and crispy. I did a shallow pan fry, not a deep fry. I didn't have the amounts of oil lying around or the patience to clean up after a deep frying session.
crispy potato fritters ready for eating.
Drain on a paper towel and devour.
I made an easy dipping sauce of yogurt (again, I know) mayo, cilantro and lime juice, and salt of course. The original recipe called for chutney but that isn't something I keep around the house so I was fresh out.
They turned out yummy. Crispy on the outside, creamy on the inside, just a little spice from the curry. Very addictive. I have eaten six and am putting the rest away before I hurt myself.
Snack attack definitely satisfied.

Mom/Gardener: a whole mess o' greens

So we have had our first frosts of the season and I'm trying to pull the last few things out of my garden, such as it was this year. With the birth of our first child this spring, it is understandable that we just didn't have time for a garden this year. What I did have was pots of herbs, peppers and tomatoes on the porch. Also some eggplants, but they never even got to flower, our growing season was so short this year. How short was it, you ask? So short that I got three whole cherry tomatoes. Cherry tomatoes people, not big beefsteaks. I now have a window sill full of green tomatoes ranging from marble sized all the way up to golf ball sized. A few may ripen but I'm going to start looking for green tomato jam recipes.

green tomatoes
 I did manage to get some peppers this year. I grew jalapenos and tried out a new (for me) variety of bell pepper called 'King of the North' which is supposed to be good for cooler climates. We got a few bell peppers but they are small and a few jalapenos as well.
peppers picked but not pickled
I also brought in the last of the basil, which surprisingly did well this year. It is being made into pesto that will be frozen for use throughout the winter.

basil pre-picking. In back: Italian basil, purple basil, Thai basil. In front: lemon basil.
 That's it for my mini-garden this year. But the CSA box has turned out to be an amazing investment. I have had more than enough fresh, organic vegetables, enough to freeze some, and make baby food too. I ended up this week with two bunches of kale, a bunch of chard and a bunch of mustard greens and decided to make my favorite green concoction, saag paneer.
a whole mess o' greens
Saag panner has several steps but comes together pretty fast.

First bring a gallon of milk to 165 degrees, slowly and stirring it frequently. Once it is at temp, add 1/4 cup white vinegar and stir. It should start to curdle and separate.
curds and whey forming
Set curds aside off of heat for 10 minutes. Once the curds have set then dump curds into a cheesecloth lined colander in the sink. Allow the whey to drain off, then rinse the curds quickly under cold water. Let drain again, then fold the cheesecloth over the top of the curds and place a small plate and something heavy (like a can of soup) on top of the cheese. Let press for two hours or overnight.
Eventually you get this:
paneer done!
Okay, that was the hard part. Next, get a big mess o' greens and chop them up. (use the stems from the chard and mustard greens, discard the kale stems) Also chop up half an onion, two cloves garlic, and mince some fresh ginger if you have any, about 1 Tablespoons worth. If you have a jalapeno or other medium spicy chili then chop that up too.
Next, hit a large saute pan or skillet with some vegetable oil and toss in the onion, ginger, chili and chard stems. Hit with a teaspoon of salt and saute for five minutes, until everything is getting soft. Now come the spices: 1 teaspoon garam masala, 1 teaspoon turmeric and 1/8 teaspoon cayenne. Saute the spices for two minutes, or until they get nice and fragrant. Then add the garlic and all the greens. Stir these around until the greens just start to wilt then add 1/3 cup broth or water, your choice. Cover and simmer on low until the greens are all cooked down, it will take about twenty minutes.
Uncover and taste for salt, add more salt if needed and throw in another teaspoon of garam masala. Add the paneer, (which you have diced up right? I usually only throw in half a batch) and if you like it a little creamier you can now stir in 1/4 cup of plain yogurt.
Serve over rice, sometimes I add turmeric to the rice for a pretty color but you don't have to do that part.
Saag Paneer, yummy!
Enjoy the yummy, creamy, spicy goodness.

Tuesday, October 5, 2010

Mom/Ant: More winter food projects

My poor husband just had three days off after three weeks of work. It was like a mini vacation. You would think he wouldn't even go into the kitchen after that much work, but being the food obsessed people we are, he very nicely decided to help me on some of my food projects during his time off. So yesterday we got down and dirty in the kitchen, (in a cooking way, not the even more fun way) and got several big projects out of the way.
Project 1: use the giant zucchini his mother gave us.
Okay, so this isn't getting me out of the innuendo hole I am digging myself, but really, all we did was shred it and make zucchini bread. Really! The zucchini yielded six cups of zucchini and so there is now 6 loaves of zucchini bread, one we are eating and five more wrapped tightly and in the deep freeze. Here are five of them:
The counter full of zucchini bread.
Project 2: Plums!
Our neighbor has a beautiful Italian Plum tree the sits on the border between our two properties. They don't like them or use them so last year they let us have half the tree. We were looking forward to them this year as well, only to go outside last week and find the tree already stripped. Someone else got to them first and I was devastated. Luckily we found a lovely vendor at the farmer's market who had cases of them for sale. We bought a case for very little money and then had a large case of plums to work with. This project had several parts.
Part one: baby food. I simmered a pan full of the fresh plums with a tiny bit of apply juice then pureed them through the food mill and put the puree in ice cube trays to freeze.
Part two: plum torte. This is my favorite way to use these. This torte is very like a coffee cake, and the plums sink to the bottom to form a jammy layer that is very delicious. (recipe at bottom of post)


Not the prettiest cake but so delicious.
Part three: freeze the rest. Nine gallon bags of washed and halved plums are now in the freezer. I am probably going to use some of them soon for jam. A friend promised me a recipe for a french vanilla plum jam that I am eager to try.

Project 3: Strawberry Rhubarb Jam
Now I know this is usually a spring thing, but I found some beautiful strawberries on sale and we luckily have four very well established rhubarb plants growing in a corner of our yard. They were a very pleasant surprise the first spring we lived here. We had mowed the rhubarb down earlier in the summer when they had gotten too old and overgrown, but they came back and so I had a second crop of rhubarb to play with this year. I didn't get fancy, just used the basic recipe in the pectin box. It turned out delicious and I used half pint jars so it is perfect for gifting.


ten jars of ruby red jam.
It was a lot of work but it felt great to get all these projects done. I love putting stuff up for the winter.

Plum Torte
Serves
8
Total Time
1½ hours
Ingredients
11 Italian plums, halved and pitted 
8 Tbsp. (1 stick) butter, softened
cups sugar, divided
1 cup flour
1 tsp. baking soda
¼ tsp. salt
2 eggs
tsp. ground cinnamon
1 tsp. strained fresh lemon juice
Zest of one lemon
Steps
  1. Preheat oven to 350 degrees. Butter and flour a 9-inch springform pan.
  2. Using an electric mixer, cream together butter and 1 cup sugar. Add flour, baking soda, salt, lemon zest and eggs; blend well.
  3. Spread batter over bottom of pan and arrange plums, cut sides up, on top. Mix remaining sugar with cinnamon and sprinkle over plums. Sprinkle with lemon juice.
  4. Bake for 1 hour or until cake is golden brown and a toothpick inserted in the middle comes out clean. Cool on a rack for 10 minutes before running a knife around the cake and carefully removing the springform sides.
  5. Serve warm with whipped cream or at room temperature.

Thursday, September 30, 2010

Mom/Chef: Lasagne of love

My best friends just had a baby. A beautiful boy just six months younger than my son, we are already referring to our boys as future best friends. It doesn't matter that we live over an hour apart, they will be best friends if we have anything to say about it. Now since my baby wasn't born that long ago I remember those first few weeks of having a new baby at home and how difficult it is to do anything but tend to the baby. (Actually come to think of it, it is still hard to get anything not baby related done.) Also being a chef I cook for people I love so I started cooking some things to bring to them. Today I made lasagna. Now my husband and I love lasagna, I mean, who doesn't? But it isn't something I cook very often because it is so labor intensive. Since I was already doing one lasagna I figured I might as well do two, one for them and one for us. I started last week by cooking up the Swiss chard and kale I get in my CSA box every week and putting it in the freezer, so this week I would have plenty for the lasagnas. Today I got everything together and started.

Step One: Clean and chop 1 bunch chard and 1 bunch kale. Saute in olive oil with garlic and red pepper flakes, salt and pepper. Let cool. (Mix with defrosted greens that were already done)

Step Two: Boil 2 packages noodles in salted water until al dente. Rinse in cool water and set aside.

Step Three: Mix together 16 oz ricotta cheese, 16 oz cottage cheese, 1/2 cup grated Parmesan, 1/4 tsp ground nutmeg, 1 tsp Italian seasoning, salt and pepper and 2 eggs.

Step Four: Grate 2 pounds mozzarella cheese and set aside.


Sauteed greens, grated cheese and cheese filling for lasagna.
Step Five: set up work area, lay everything out including pans and sauce. Sidenote: okay, despite the fact that I like to make things from scratch and all that I almost never make pasta sauce from scratch. My version of from scratch pasta sauce is a can of good quality tomatoes that I can gussy up however I feel like. Starting with fresh tomatoes is just too much for me. And when I do lasagna I always just buy jarred sauce. It is so much work anyway, why make lasagna even harder?


Noodles, pans and sauce ready to go.
Step Six: Assembly! Start with some sauce on the bottom of the pans. Add two layers of noodles on the bottom, then add some of the ricotta cheese mixture, greens and shredded cheese. Add another layer of noodles and repeat.
Lasagna in progress.
Step Seven: Finish lasagna with a layer of noodles, sauce and shredded cheese.

Lasagnas done!
Now I made tons of prep stuff and ended up with enough for three lasagnas, which isn't necessarily a bad thing at all. I wrapped them up and stuck them in the deep freeze.

Now they will be ready whenever I go visit next. Not bad for an hour and a half of work. Next project, squash soup!


Mom/Baker: Why I rarely bake

Several days ago I decided to try out a recipe found in the Penzeys Spice Catalog, previously mentioned before in this post.  It was for a lemon poppy seed cake with berries. Now lemon poppy seed is one of my favorite cakes from childhood so I couldn't pass the recipe up. It was pretty simple and looked pretty in the magazine. It went together pretty easily, and got into the oven without any problem. Changes I made to the recipe included leaving out the poppy seeds and substituting blackberries for strawberries since that was the fresh berry I had on hand. I had meant for the cake to be poppy seeded but somehow between when I placed the baggy of poppy seeds in my cart at the grocery store and when I checked out they disappeared. The problem began with the baking. The recipe said to use a metal loaf pan not a glass one, but guess what, I only own glass loaf pans, so glass it was. Also the recipe said to place a piece of parchment paper on the bottom of the loaf pan, which I did not do, I just buttered the pan really well.  The recipe is pretty vague on times, it said anywhere between 55 and 65 minutes of baking time, so after 55 minutes I checked the cake and found it still really jiggly, so I baked it 10 more minutes. After 65 minutes of baking I checked the cake by inserting a knife into the center of the cake. It was still really wet, so I baked it 10 more minutes. After all of that the cake finally tested done but it had sunk in the middle! I pulled the cake out and cooled it for 15 minutes then tried to turn it out of the pan. It stuck on the bottom and when it finally did come out the edges crumbled. Still, the cake is delicious, moist and lemony and the berries add a nice sweetness. I will definitely make it again.

Lemon berry cake, you can see the edges crumbled, the blackberries sunk and the center of the cake sunk as well.
The problems with this cake reflect the reasons I rarely bake. I suck at it. Even basic recipes require much more careful concentration from me than their equivalent savory recipes. I can throw really good savory food together without much fuss, but baking takes me twice as long and often something comes out just slightly off. Not sure why I can't bake but luckily my mother is an expert baker. She can turn even basic dessert recipes into amazing things, plus she makes up her own recipes, which I would never dare do. Maybe like highlanders there can be only one baker per family?
Anyway, I suggest you try this recipe, perhaps yours will come out prettier than mine did.
Berry Surprise Lemon Poppy Seed Cake
1 1/2 cup AP Flour
2 tsp. baking powder
1/4 tsp. salt
1/3 cup milk
2 Tbsp. plain yogurt
1 1/2 cup sugar
6 Tbsp butter
1/4 cup canola oil
2 large eggs
3 Tbsp fresh lemon juice
1 Tbsp grated lemon zest
2 Tbsp poppy seeds
2 large strawberries, washed dried and sliced

Preheat oven to 325 degrees. Grease a metal loaf pan or bundt pan. If using a loaf pan, add parchment paper on bottom of pan.
Sift together dry ingredients: flour, baking powder and salt into a bowl and set aside. Mix milk and yogurt together in a separate bowl, set aside. In mixing bowl cream together butter, sugar and oil until light and fluffy. Add eggs one at a time. Begin adding dry ingredients and alternate with milk mixture until all is combined. Stir in lemon juice, lemon zest and poppy seeds. Pour half of the batter into the pan. Carefully layer the strawberry slices on top of batter and then top with remaining batter. Bake for about 55 - 65 minutes or until a tester inserted in the center comes out clean. Cool in pan for 15 minutes and then turn out and cool completely. Serve with whipped cream and more fresh berries.

Monday, September 27, 2010

Mom/Online Shopper: The Portugese made it through, M'am.

Okay, so this only makes sense if you are in my head, but at the beginning of the month I did an online order through Penzeys Spices. While I was waiting for the order to arrive I would tell my husband that I was waiting for my shipment from the Portuguese to arrive. You know, Portuguese spice traders, spice shipments...it really is only amusing if you are a nerd like me. Anyway, when the spices took a long time to reach us my husband would ask me if the Portuguese had arrived yet and I would joke that they were held up around the Horn of Africa or stuck in a storm...yeah, as I said, I'm a nerd. So last week the order finally got here. Luckily the problem was not Penzeys, which makes me glad because I love them and would be sad if I couldn't order from them. The problem was our post office. My tiny little town doesn't have door to door mail service, we have a central post office and if you have an address here in town then you get a post office box. Well, despite the fact that I had put both my street address and post office box on the shipping address somehow only the street address came through and somehow my post office couldn't figure out who the box belonged to. Two weeks later they finally figured it out and I got my spices.


My spice order, the large jars in back are cumin and coriander in jars I had lying around.


Oh happy day, I ordered large batches of Cumin and Coriander because I use them in almost everything and I was totally out. (I order them as whole spices so they last a long time) I also got some smoked paprika and a crushed red pepper called Aleppo pepper that I had read about in several recipes and wanted to try. The lovely people at Penzeys also sent me a lemon pepper mix and a catalog. Oh, the catalog, reading through it is like reading through toy catalogs was when I was a kid. All the different spices and spice mixes gave me lots of ideas for things to try myself. Plus there were recipes, some of which looked quite good.
I have already used the aleppo pepper and lemon pepper mix on several different things, with good results. The lemon pepper mix actually tastes of tangy lemon, not salty and fake like some of the cheaper spice blends you find in some grocery stores. The other night I got out some tilapia fillets and went old school, like my parents used to do when I was a kid. I hit the fish with the lemon pepper mix, some butter and fresh lemon juice and baked it.
fish ready for the oven.
To go with the fish I tried a grain casserole I have had the idea for but hadn't tried yet. I cooked up some bulgur and made a light white sauce, then stirred together the bulgur, white sauce, cheese, some dried herbs and a little of the aleppo pepper and baked it for half an hour at 350.

Bulgur casserole ready for the oven.
 The bulgur baked up creamy and almost like a corn pudding in texture, it turned out very yummy. It would also be great I think with a heartier grain like barley or farro, in fact the recipe is based on a baked farro recipe I saw Giada do. A quick saute of some zucchini and it was dinner.
Baked fish, bulgur casserole and sauteed zucchini.

All in all I have been very happy with my spice order. I believe I will be employing the services of those brave Portuguese Spice Traders again soon.

Friday, September 17, 2010

Mom/Chef: caterpillar curry

So, as usual, once the baby went down for a nap this afternoon I started on some dinner prep. I cut up a bunch of vegetables for curry. It is almost the weekend and time for a new CSA box and I needed to use up some of last weeks vegetables that were still hanging around. I started oil in a large skillet and threw in some onions and broccoli stems. While sauteing I noticed a non-onion looking thing, and upon pulling it out of the pan discovered a caterpillar! Okay, I thought, I rinsed the broccoli but obviously not well enough, so I went through the skillet and the plate of broccoli florets and found one more small caterpillar that had crawled out of the broccoli and onto the plate. I removed said caterpillars, rinsed the broccoli once more and gave myself a pep talk about the hazards vs benefits of organic vegetables. I mean really, its only two caterpillars and I caught them, plus the organic vegis are usually so good. So anyway, spirits bolstered I went on to add the bell peppers to the pan, and then the broccoli florets. Seconds later three more caterpillars begin oozing out of the broccoli and frying themselves in my skillet! Now, I know that bugs are protein and many cultures eat them, but I'm sorry, I guess I'm just too squeamish. The pan of vegetables went into the trash, the skillet into the sink and the rest of the vegetables into the fridge until I decide what to do for dinner. The rest of the chopped vegetables are bug free, I know it was just the broccoli, but I may have lost my appetite for vegi curry.
Preped vegetables and caterpillars on the stove.
Maybe I'll have cereal for dinner...
Two caterpillars, one fried, one fresh that found their way into my curry.

Wednesday, September 15, 2010

Mom/Traveler

So the baby and I spent the weekend in the big city. (I say 'big city' like I didn't live there myself for five years.) My bff's were having their baby shower, and I also hung out with family and had a fabulous brunch at The Rusty Pelican.  The downside was that strep throat was going around and the day after we left my Mom came down with it. I have been watching baby and myself like a hawk, obsessively taking temperatures, and so far, so good. All in all it was a good trip, it was great to see everyone and fun to be back in the city. I love where we live, up in the mountains, but there are definitely some things I miss about living in the city, primarily family and friends, also the great restaurants.
When I got home Sunday afternoon I found that my husband, when he went to pick up the CSA box Sunday morning was unable to resist the beautiful squash blossoms. This is the second week we've come away from the Farmer's Market with these lovely and fragile flowers, and each time we've tried a different stuffing.
Our first time around we did a sauteed mushroom filling consisting of finely chopped mushrooms with garlic, thyme, basil and white wine. Basically a French duxelles. Those were surprisingly delicious, though I admit at first I thought the mushrooms would be too strongly flavored for the squash blossoms.
Our second attempt used a recipe from Jamie Oliver and consisted of ricotta cheese (I used homemade), lemon zest, one small chili pepper minced, lemon zest, mint and Parmesan.
Both times the stuffed blossoms were dipped in a tempura style batter: flour, egg whites, baking powder,  and cold water before being fried. Both were great, but the mushroom stuffing was the best.
Mushroom stuffed Squash Blossoms

Thursday, September 9, 2010

Mom/Fan Girl

So lately I have been rediscovering my fan girl self. This month my satellite TV provider is doing a free channel preview to try to get me to upgrade (they do this periodically) but this month its the Cooking Channel. I had heard some criticism that the Cooking Channel only existed to play Food Network's extras, which is true, partially. They also play some great old school shows like Julia Child and Graham Kerr and the Two Fat Ladies. But what really has my inner fan girl going is Jamie Oliver's show, Jamie at Home. Do you remember Jamie Oliver? I became obsessed back when he was the Naked Chef. He was cute, I was young, and his cookbooks were pretty. I used to get them from the library, read through them and copy out all the recipes I wanted to try. Can you tell I was destined to work with food? Anyway, I have rediscovered him and this new (to me) show of his is so great. In 'Jamie at Home' he shoots the whole show out in his garden, and every episode highlights a different vegetable or two. He does several different recipes, all very fresh and easy and all highlighting what is best about that certain vegetable. This show is so right up my alley, too bad I will only have him for a month. Still, today I got some great tips on roasting beets and carrots, and saw a delicious looking Indian-spiced lamb and carrot dish I totally want to try. Not only does this show fit in with my world view of local, sustainable, fresh cooking, I also really envy his garden. Of course, it says right in the credits that he employs a professional gardener, I'm sure I could have a garden like that if I had someone to work on it full time for me. Oh well, I can always dream.

Mom/Chef: dinner last night

Found a three pound-ish chunk of pork shoulder in the freezer the other day and pulled it out to defrost. Yesterday afternoon when baby went down for a nap, I decided to get some dinner done. Now normally I would go Mexican with this and make carnitas, but the veggies I have lying around speak less of Mexico and more of Provence. So I seasoned the pork well on all sides with salt and pepper and got some oil screaming hot in my favorite pan, a Le Creuset knock-off from IKEA that works amazing on stews and roasts. I browned the pork on all sides, then deglazed with some white wine. Added some chicken stock and water to come ¾ of the way up the sides of the roast, threw in some sliced onion and celery, a big thyme sprig, a bay leaf and a couple of whole pepper corns. Then I slapped the lid on and threw it in the oven at 275 F.


After two hours of cooking I threw in some parsnips and carrots and put it back in for another two hours. When I could poke at the pork and have it fall to bits I pulled it from the oven, spooned the meat and vegetables out and placed the pan back on the stovetop over medium-high heat. In a small bowl I mashed up about 3 Tablespoons of flour with two tablespoons of bacon drippings (butter would have also worked) and stirred this into the bubbling liquid. This simmered five minutes until it thickened up into a light gravy, got some salt and pepper added to it and then I hit it with some sherry vinegar (red wine or white wine vinegar would also have worked but I was out of both) and the meat and veggies were dumped back in along with some roasted baby beets I had in the fridge. The end result? Provencal Roast Pork with root veg.

It turned out great, really good flavor and tender pork. The only problem? The beets turned the sauce bright red. Maybe I will heat those on the side next time. The best part? Tonight, leftovers!

Monday, September 6, 2010

Mom/Ant

Not Aunt, though I am one of those too, but ant as in the grasshoper and the ant. I love cooking and putting away food for the winter, it makes me feel all warm and cozy-like inside. So, my husband had the last two days off, and while it may sound like the last thing a chef would want to do on their day off, we spent today cooking. Yesterday's CSA box came with a ton of vegetables and the realization that we still had stuff in the fridge from last week. Today we cleaned the house, took the dogs for a walk, and when the baby went down for a nap we got down to some serious cooking. We have made two types of ravioli: one with a swiss chard and homemeade ricotta filling and one with a zucchini-chicken filling.
Swiss Chard Ravioli waiting to go into the freezer.

These plus the big batch of pesto I made will mean there are several easy meals in the freezer, a must when you are wrangling a four month old.  A couple bunches of beets have been roasted and frozen. We also have a big pot of chicken broth on the stove, using up a couple of chicken carcasses I had in the freezer and a bunch of the extra bits of our vegetables, such as carrot tops, leek tops, onions skins, celery trimmings, etc. We are making leek and new potato soup tonight, something easy after all the cooking of the last two days. It seems like a busy weekend, but it has been fun. My husband and I met in the kitchen and worked together there until the baby came.Cooking continues to be a shared passion for us and something we enjoy doing together. Plus, it makes me feel like a very prosperous ant to see my freezer stocked full of yummy summer goodness.

Last night we had Pho for dinner which used up a lot of herbs (cilantro, basil, mint) plus the last of a roast chicken I had. Pho is my favorite version of chicken noodle soup and pretty easy to do if fish sauce and rice noodles are pantry staples for you.


Recipes:
Swiss Chard Ravioli Filling
1 bunch swiss chard, leaves and stems chopped separately
1 bunch kale, leaves chopped stems discarded
1 bunch beet tops, leaves and stems chopped separately
3 cloves garlic, minced
1 shallot, minced
1/4 tsp. red pepper flakes
1 cup ricotta cheese, hommemade or store bought
1/2 cup mozzarella cheese, grated
1/4 cup grated parm
salt and pepper
In a large saute pan heat some olive oil, add shallot and cook 1 minute. Add chard and beet stems and a pinch of salt cook until they start to soften. Add red pepper flakes, garlic, chopped greens and another pinch of salt, cook until greens are thouroughly wilted and all the moisture is cooked out. Spread on a plate and place in fridge to cool. When the greens are cool, place in a bowl with the cheeses and mix well. Add salt and pepper to taste and use to fill ravioli. You can use store bought or homemade pasta sheets.
Ravioli in progress.

Zucchini and chicken Raviloi

1 boneless skinless chicken breast, minced or ground in food processor
1/2 onion, grated
1 zucchini, grated and moisture squeezed out
2 cloves garlic, minced
1 sprig thyme
splash of white wine
1 cup ricotta cheese, hommemade or store bought

1/2 cup mozzarella cheese, grated
1/4 cup grated parm
salt and pepper
2 tbsp. fresh basil, torn

In large skillet, heat some olive oil and add chicken a pinch of salt and sprig of thyme. Cook until chicken is cooked through, scrape into bowl and set aside. Add some more oil to the skillet and add the zucchini, onion, garlic and another pinch of salt. Cook until vegeatbles are softened and starting to brown, about five minutes. Add the wine to the pan and add back in the chicken. Stir everything together and scrape any browned bits off the bottom of the pan. Spread on a plate and place in fridge to cool. When the filling is cool, place in a bowl with the cheeses and mix well. Add salt and pepper to taste and stir in the basil then use to fill ravioli.

Saturday, September 4, 2010

Mom/Hairstylist: What not to do

So I went from working full time to being a stay at home mom this year, and while my husband still works all those great twelve hour days in the kitchen, those of you who know the industry know you do it for love, not money. Needless to say we are on a budget, luckily for me I like making things from scratch and being a little DIY. Unfortunately, hair cutting should not be one of those things. My bangs were getting too long, and I figured it wouldn't be too hard to trim them up a little and save myself the money for a haircut. Long story short, epic fail. My bangs are now too short and uneven to boot. I am trying the theory that brightly colored headbands distract from bangs gone horribly awry. While I will continue with many of my DIY projects, hair cutting isn't one of them.

Mom/Chef: dinner last night

This is, I hope, what a lot of my posts will be about because food is a huge, consuming passion for me. (Yes, I know how cheesy that sounds) Dinner last night, thrown together between bouts of baby fussiness, was sauteed vegetables over cous-cous. Easy, versatile and I won't bother posting a recipe except to say that I used zucchini, onions, garlic, peppers and some yellow wax beans I had hanging around. The trick is to stir in cilantro and mint at the end, and sprinkle on the feta of course. But what was really amazing was this little dish I threw together as a side.
I had picked up a couple of beautiful Japanese eggplant at the farmer's market on Sunday and remembered seeing a recipe that I had wanted to try in the July/August edition of Food Network Magazine.
Sidenote: as a chef and food snob, I was totally prepared to hate this magazine, I thought it would be a list of what celebrity chefs were doing and whatnot. But when I was in the hospital giving birth to my son, my sister-in-law brought me a copy and I am happy to say I was wrong. There are of course the celebrity chef bits, but there are also a ton of great recipes. This was one of them.
Back to the post, I threw it together the other day and tried it last night, and now can highly recommend it to you. I give you:
Stuffed Eggplant with Walnuts
From: July/August 2010 Food Network Magazine. Posted without permission
1/2 cup bulgur
1/3 cup extra virgin olive oil
3 Japanese eggplants, halved lengthwise
2/3 cup walnut pieces
1/2 small red onion, roughly chopped (I used a sweet onion instead, it worked fine)
1 stalk celery, roughly chopped
1 clove garlic, smashed
1 cup fresh cilantro
3 tablespoons fresh tarragon
1 teaspoon ground coriander
3 tablespoons white wine vinegar (I used tarragon vinegar)
crumbled feta cheese
Put the bulgur in a bowl, add 1/4 tsp. salt and 1 cup boiling water. Cover and let sit until the water is absorbed and bulgur is cooked, about 15 minutes. Heat olive oil in a skillet over medium-high heat. Lay the eggplant halves in the skillet, sprinkle with salt, place another skillet on top and press down adding a couple of cans for weight. Cook 6 minutes. Remove the skillet and cans, flip the eggplant, sprinkle with more salt and recover and cook another 5 minutes. They should be golden brown and flat. (If you don't use enough oil the eggplant will stick) Transfer to a plate to cool.
Put the vegetables and walnuts in a food processor and pulse until they go from coarsely chopped to finely chopped. Add the herbs, ground coriander 1 tsp. salt and some black pepper and pulse until smooth. Add bulgur and vinegar and pulse once or twice to combine. Spread this mixture on one half of the eggplant and sandwich with the other half. Wrap tightly in plastic wrap and chill at least one hour, though chilling overnight didn't seem to harm it any. Serve with crumbled feta and a drizzle of olive oil. I found that a squeeze of lemon juice really brightens it up though, so add that too.

Welcome!

So this is the inaugural post of Mom/... my blog on life and everything that goes along with it. Hopefully I will be able to not only keep up on it but also make it interesting enough to keep people tuned in. I play a lot of different roles in my life and I hope to use this blog to explore those roles as well as chat about all the things I find fascinating and want to share. I am definitely a blog lurker, I have read many blogs and envied their authors, but never taken the blog plunge myself. So, without further ado, here goes nothing!